1. How to use the default unlock pattern
  
Unlock your computer by the following steps:

1. Mouse down at the start point (Do not release the mouse button)
2. Mouse move to draw the unlock pattern
3. Mouse up at the end point to confirm
2. Hotkey
a. Win + A : for quick locking computer
b. Win + C : for quick opening configuration window
c. Escape : for canceling incorrect unlock pattern
d. Enter : for showing/hiding unlock pattern window
3. How to lock your computer
a. Run Eusing Maze Lock application firstly. Then you can use hotkey (Win + A) to lock computer quickly.
b. Or left-click the Eusing Maze Lock icon in the system tray to lock.
c. Or right-click Eusing Maze Lock icon in the system tray. Then select "Lock Computer" item in popup menu.

4. How to reset the unlock pattern
5. I forgot my unlock pattern
a. If you did not enable auto-lock at Windows startup. You can reset to the default pattern by reinstalling Eusing Maze Lock.
b. You can press F8 between system boot and enter the safe mode. Then reinstall the software to reset the default unlock pattern.
6. My unlock pattern window is disappeared. How to get it back?
a. You can double-click on the background image to get it back.
b. Or press 'Enter' key once. Unlock pattern window will be appeared. Remind that press 'Enter' key only once. If you pressed twice, unlock pattern window will be disappeared again.
7. What is the unlock mode?
Eusing Maze Lock  has three unlock modes.
Now click Here to Download it.......

As we know all mouse can be used for clicking, selecting, and performing some operations on the computer, we should also be aware we can still perform all sorts of operations without making use of the mouse.
There can be cases where the mouse could be faulty or unavailable, and we need to still perform some operations in the computer, the good news is that keyboard shortcuts can perform virtually everything you want to do with the mouse.

Another good thing about using keyboard shortcuts is that it is much faster performing operation compared to using the mouse, and using keyboard shortcuts makes you more like a computer geek.
There are several keyboard shortcuts but we are focusing on the 15 most important ones. Find below the keyboard shortcuts and uses (Windows Users Only):
NB: Make sure you try them as you are reading.


Ctrl + F =======> Find (To find a text/file in the computer, browser, e.t.c)Ctrl + S =======> Save (To save document, web page, e.t.c)Ctrl + D =======> Delete (To delete any file, document, text e.t.c)Ctrl + P =======> Print (To print a document or anything on the pc)Ctrl + A =======> Select All (To highlight all contents, files, text, e.t.c)Ctrl + N =======> New Window (To open a new window, file, e.t.c)Alt + F4 (Or Ctrl + W Or Ctrl + Q) =======> Quit (To close a windows program, e.t.c and can also be used in shutting down)Alt + tab =======> Switch Windows (To switch between windows)Alt + tab + tab + … + tab =======> Continuous Switching (To continue changing windows)Windows key + M =======> Minimize (To minimize current windows program)Shift + Windows key + M =======> Maximize (To maximize the currently minimized windows)Windows key + E =======> Open Windows explorer (To open My computer windows)Windows key + R =======> Open Windows program (To open a windows program e.g cmd, notepad, e.t.c)Windows key + D =======> Display desktop (To open windows desktop)Windows key + L =======> Lock Windows (To lock windows)


Note: Ctrl means Control, Alt means Alternate and Windows Key is the button on your keyboard the has the windows logo

This content details the 5 hidden ways which you can use to launch task manager on your windows computer.

Task manager is a very essential program in the computer that monitors the running program in the windows computer, runs checkup on the CPU usage, network activities, memory information, logged-in users, statistics and system service. In one word, task manager commonly known as windows task manager helps to monitor the overall performance of the computer.


There are various ways to launch the task manager program on your windows computer, but be honest; most of you know just one way to launch task manager. Am I right? Well, don’t worry, I’ll reveal the four hidden ways; add up with the one you know, making it a total of FIVE.

5 Hidden Ways to Launch Task Manager in Windows


1.       Are you familiar with the CTRL+ALT+DEL short keys? Simply press the three keys on your keyboard, and you’ll get the screen shown below, simply select “Task Manager”.


2.       Do you know that you can open task manager using CMD? Here’s what to do, simply launch your command prompt and input “taskmgr”, don’t include the quotes, then hit enter on your keyboard.


3.       I bet you’ve not opened task manager from Run Program. Simply press “win+r” buttons, and input taskmgr, then hit enter. Your task manager will be launched immediately.

4.       I doubt you know this fourth trick. Do you know that “Ctrl+Shift+ESC” buttons can launch the task manager? Simply press those keys on your keyboard and watch out.

5.       The final method that most of you are familiar with. Simply Right click on the task bar of your windows computer and select “Task manager”.


That’s it on the 5 hidden ways to launch task manager on your windows computer. Hope you learnt something new today. If you’ve any other method you use to launch your own windows task manager, feel free to let everyone know via comment section. Don’t forget to share this tips with your friends.

Basically, Android emulators are softwares that simulates or run most of our android apps or games on our computer, by imitating the apps and games on our computer. In other words, integrating games or apps specially made for android to our computers.

Bluestack 2 is the latest version of bluestack emulator that lets you run android apps and games on your Windows PC and it’s known to be the most popular freemium android emulator that is made available for windows computer.

This Bluetsack 2, as an upgraded version of bluestack that comes with new features and more advanced interface to completely emulate android apps and games on your computer.

What’s New in Bluestack 2?


1.       Ability to run two programs on same windows (advanced multitasking)… with the bluestack 2, you can be gaming and replying text or social messages on same windows, and still avoid battery drainage at same time.

2.       You get to run your apps and games on bigger screen… unlike your 5inches or 5.5inches android screen, you get to run your android games and apps on your computer massive screen which helps to improve gaming experience and all that.

3.       Synchronization of apps and games between windows apps and phone through a cloud connect app

4.       Advanced app player for better gaming experience.

5.       Sideloading of apps and games to computer has been made easy via double-click action.

Requirements, Downloads and Usage?

On your windows computer, you’ll need to have a minimum of 8GB hard disk space to download the Bluestack 2 app and also a minimum of 2GB RAM for better gaming speed and experience. Once your computer meets up to the required memory, you’ll then need to download Bluestack 2 app here and install on your computer.

After installation, launch the program, and you’ll can play some already loaded games and enjoy some apps that comes with the Bluestack 2 emulator. If you can download any other android app or games from play store directly to your computer and run. I already published an article on how to directly download apps or games from play store to any computer. Don’t forget to share this article with your friends on social networks, and feel free to drop your comment.

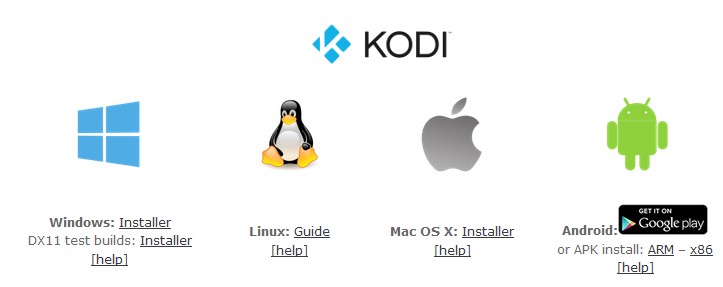
I notice that a lot of people mistakenly downloading a wrong setup of kodi tv for their device, so i decide to provide the exact link where you can download the correct kodi setup that will suite your device.


Download Links For Kodi Tv

For PC users click HERE to download your kodi tv


For Android users click HERE to download your kodi tv

For Mac OS X (Iphone,Ipad) click HERE to download your kodi tv

Are you New to Kodi Tv?

Click HERE to learn how to setup your kodi tv

Click HERE to Add Super Sport Channels on your kodi tv now

With Advanced RAM Optimizer Pro v2.1 BlackBerry You can now optimize your Device performance by reclaiming unused RAM periodically with Advanced RAM Optimizer! 
It has options like -Optimize Now and Auto Scheduler  
It enhance the performance of your BlackBerry®

Ram Optimizer silently works in the background and optimizes your RAM to give you a better BlackBerry® experience.
If memory is wasted, RAM Optimizer automatically recovers Lost Memory and assigns it to running applications so that your Device runs faster and smoother.


Version: 2.1
File Size: 899 KB

  • Required Device Software
  • Operating System: 4.6.0 or higher
Advanced RAM Optimizer Pro v2.1
Bart 
Or click here for BlackBerry World downloading link


We don't need to pay much for Megabytes anymore, since there are means for us to get Gigabytes at a low-cost. On Airtel, N1,500 will give you only 3GB. Globacom is undoubtedly one of the best networks in Nigeria when it comes to data bundles and their durability. For the past 2 years, Glo bis of 3GB for N1,000 as being a better means for Android users to surf the web with affordable price. Here’s how to even benefit more by getting 6GB for just N1,500!

How To Activate Glo 6GB
The trick involved is to subscribe for the Glo monthly plan of 3GB at N1,000 and also subscribe for the Glo weekend plan of N500 for 3GB.

Procedures
1. Load N1,000 airtime and activate the monthly plan of 3GB by dialing *777*21# and you’ll be given 3GB for 30days.
2. Also, load N500 airtime on that same Glo Sim card and dial *777# and follow the prompt [Data Services » Buy Data » Night and Weekend plans], then select 2 for weekend plan to activate the Glo 3GB for N500.

After that, remove your battery and re-insert it after 5 minutes. That's all! Your 6GB plan is fully activated.

Note: You cannot use both of the plan at the same time. What you need to do is to pulse your Blackberry subscription by changing the APN to glosecure or gloflat. The Combination of the both plan works better 
on Android devices that support Glo Bis tweak, but you can use the Glo weekend plan on any type of browsing device. 

The weekend plan works only during weekends + 7nights after the weekend.
If the Glo network is very okay in your locality and you have better things to do with data bundle during the weekend, like watching live matches or movies, heavy downloading, upgrading/updating the system and Smartphones. Allow your Glo bis to last long, simply power it up with the Glo weekend plan. No dulling guys.
- See more at: http://www.shelaf.com/2016/01/glo-6gb-data-bundle-for-just-n1500.html#sthash.miOaD4QT.dpuf

MARI themes

{instagram#Boscy1}
Boscyblog. Powered by Blogger.